
Account Group
View your organization overview including all businesses and merchants under your Doitpay account.
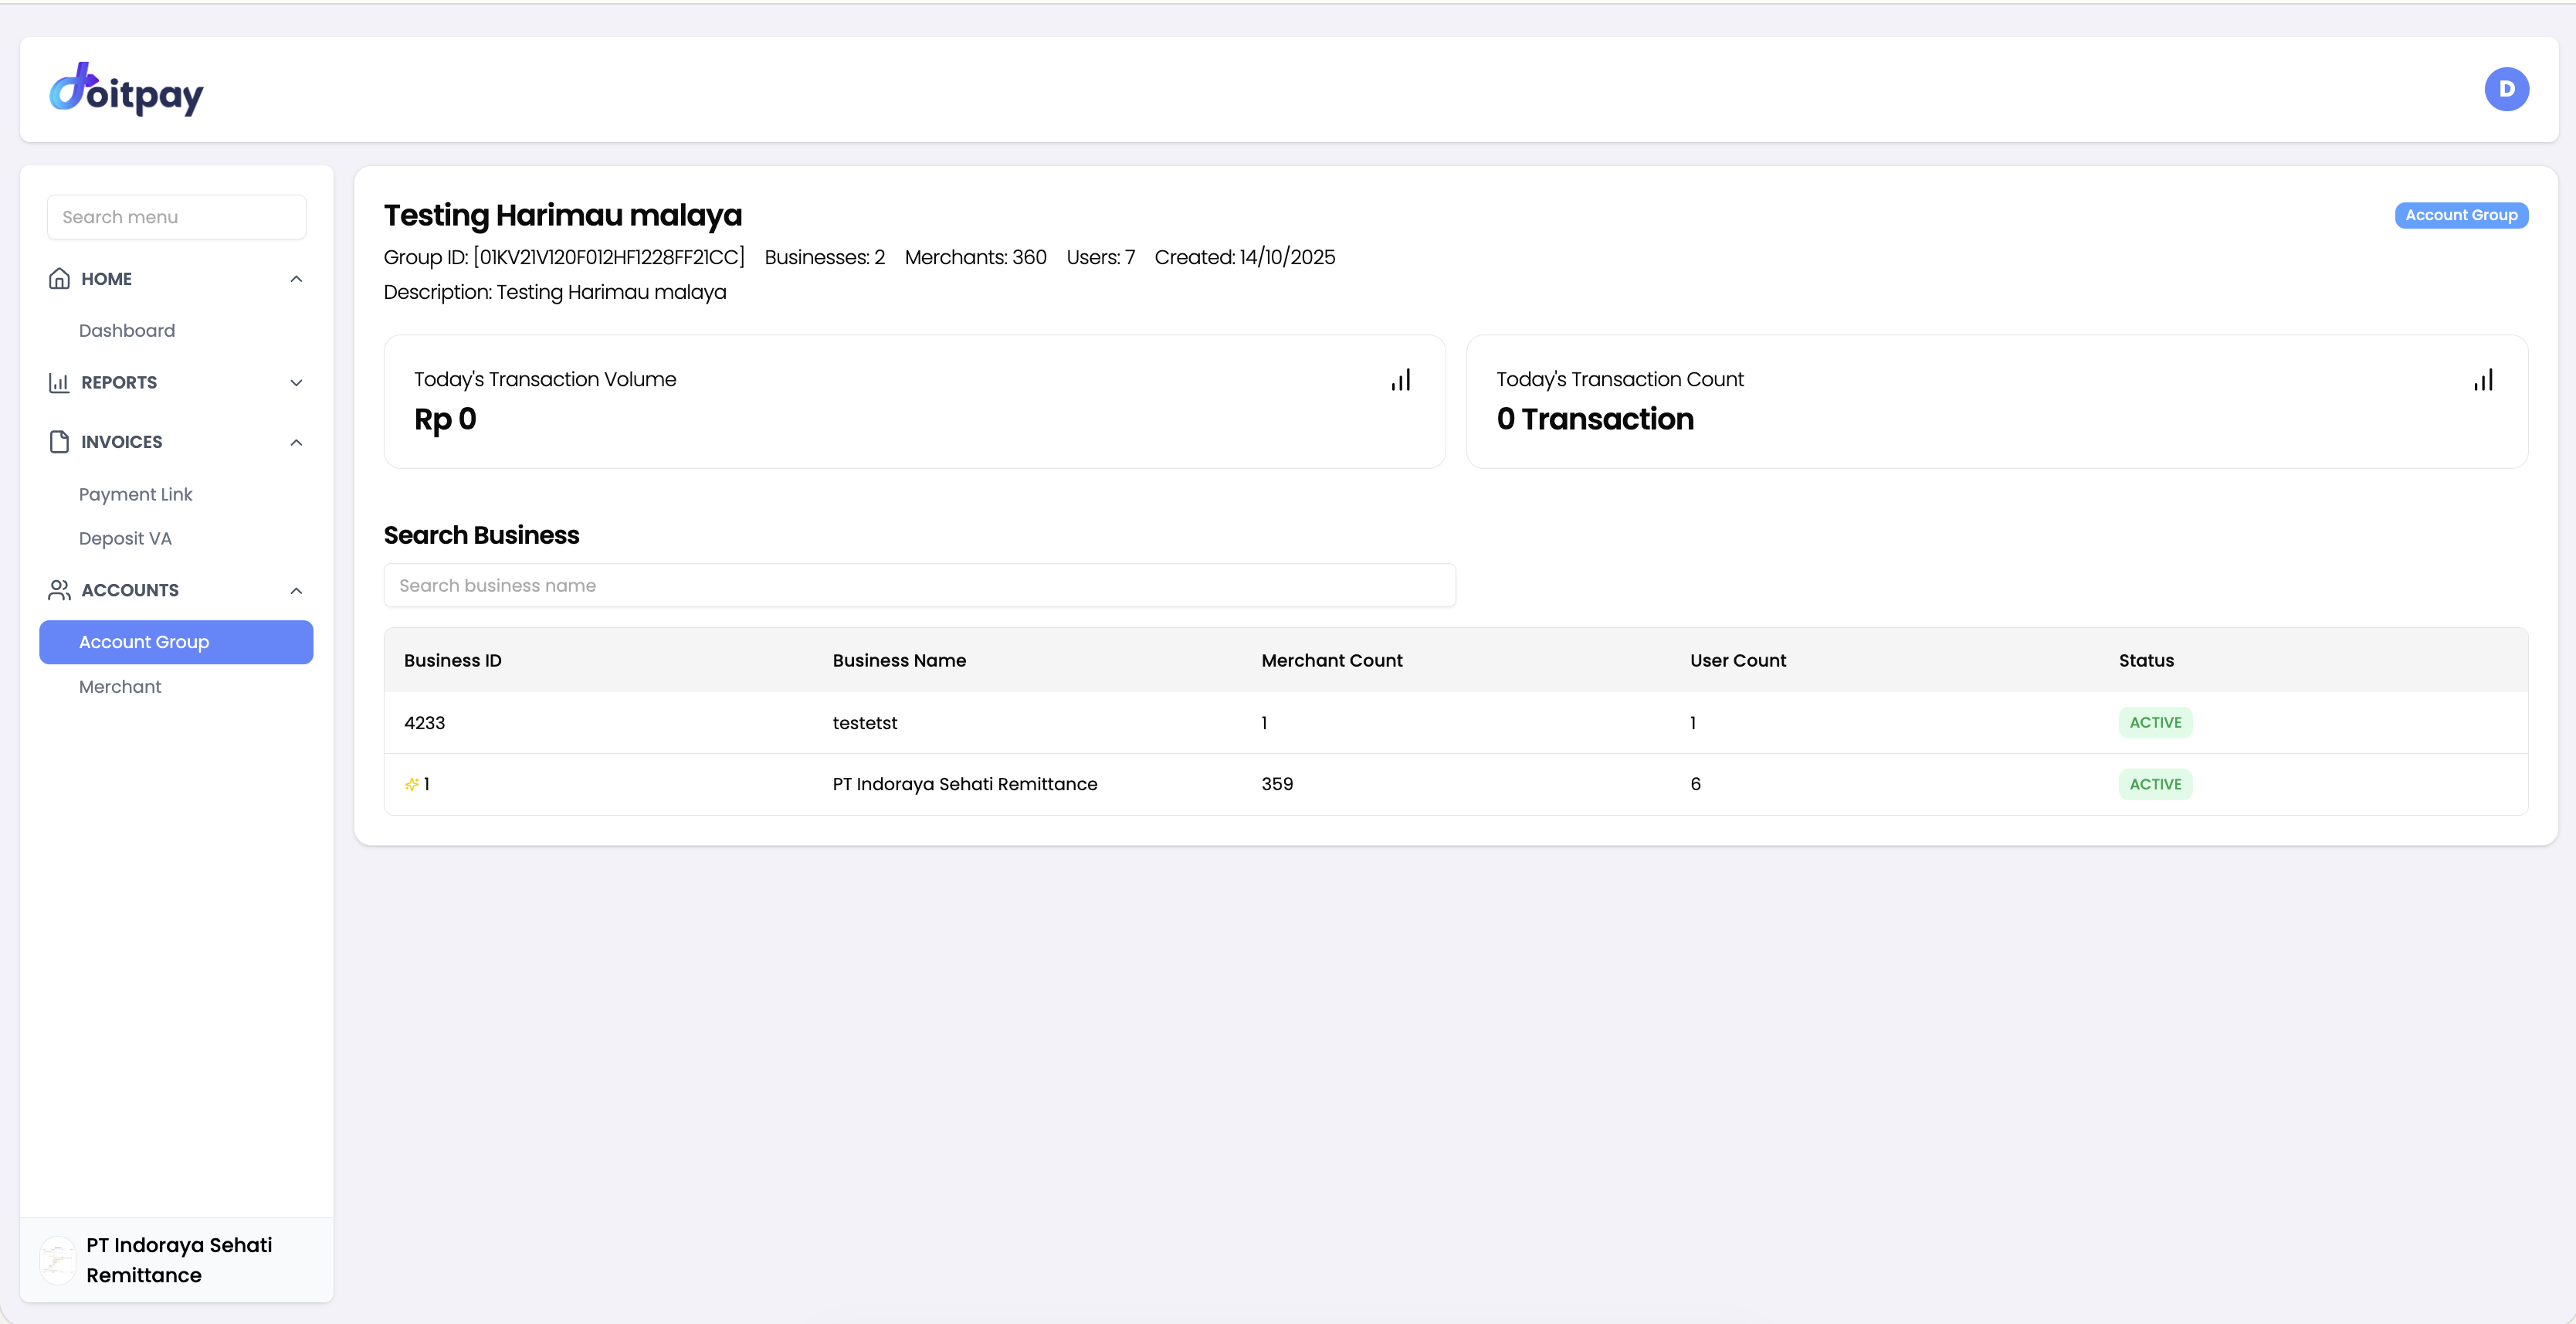
Account Group represents your organization in the Doitpay system. This page provides an overview of your business structure, including all businesses and merchants under your account.
Understanding the Account Structure
Doitpay organizes accounts in a hierarchy:
Account Group (Your Organization)
└── Business (Business Unit/Division)
    └── Merchant (Store/Outlet)
└── Transactions- Account Group: Your top-level organization
- Business: A business entity or division within your organization
- Merchant: Individual stores, outlets, or brands that accept payments
This structure allows you to manage multiple businesses and merchants from a single dashboard.
Roles and Permissions by Level
Each level in the hierarchy has different capabilities and visibility:
| Capability | Group | Business | Merchant |
|---|---|---|---|
| Dashboard access | Yes — aggregated view across all businesses | Yes — view own business data | No dashboard access |
| View transactions | All transactions across all businesses | All transactions across own merchants | Accepts payments only |
| Reports | Aggregated reports across all businesses | Reports for own merchants only | No report access |
| Manage businesses | Can manage businesses under them, but cannot create new ones | Cannot view or access other businesses | N/A |
| Manage merchants | View merchants per business | Can create and manage merchants | N/A |
| Settlement | View settlement across businesses | Settlement runs per business to its configured bank account | N/A |
| Disbursement | View disbursement across businesses | Disbursement balance and transfers managed at business level | N/A |
| API credentials | View per business | Manage own API keys and webhooks | N/A |
| User management | Manage users across businesses | Manage users within own business | N/A |
Key Differences
- Group has the widest visibility — it can view all transactions, reports, and balances across every business, but cannot edit business-level settings directly. New businesses can only be added by contacting your Doitpay account manager.
- Business operates independently — it cannot see other businesses under the same group. It manages its own merchants, users, API credentials, and disbursement balance. Settlement is processed per business.
- Merchant is the point of sale — it is a store or outlet that accepts payments. Merchants do not have dashboard access or reporting capabilities. They are managed entirely by their parent business.
Accessing Account Group
Navigate to ACCOUNTS > Account Group from the sidebar.
What You See on This Page
Account Summary
At the top you will see your organization's key information:
- Group ID: Unique identifier for your account group
- Group Name: Your account group name
- Merchants: Total number of merchants across all businesses
- Users: Total number of users with access
Business List
The table shows all businesses under your account group:
| Column | Description |
|---|---|
| Business ID | Unique identifier for the business |
| Business Name | Name of the business entity |
| Merchant Count | Number of merchants under this business |
| User Count | Number of users with access to this business |
| Status | Active or Inactive |
Searching for Businesses
Use the Search business name field to filter the list when you have multiple businesses.
Understanding Status
| Status | Meaning |
|---|---|
| Active | Business is operational and can process transactions |
| Inactive | Business is disabled and cannot process transactions |
| Pending | Business is awaiting activation |
Business Details
Clicking on any business row opens the Business Details page, which contains five tabs covering all aspects of that business.
Merchant Tab
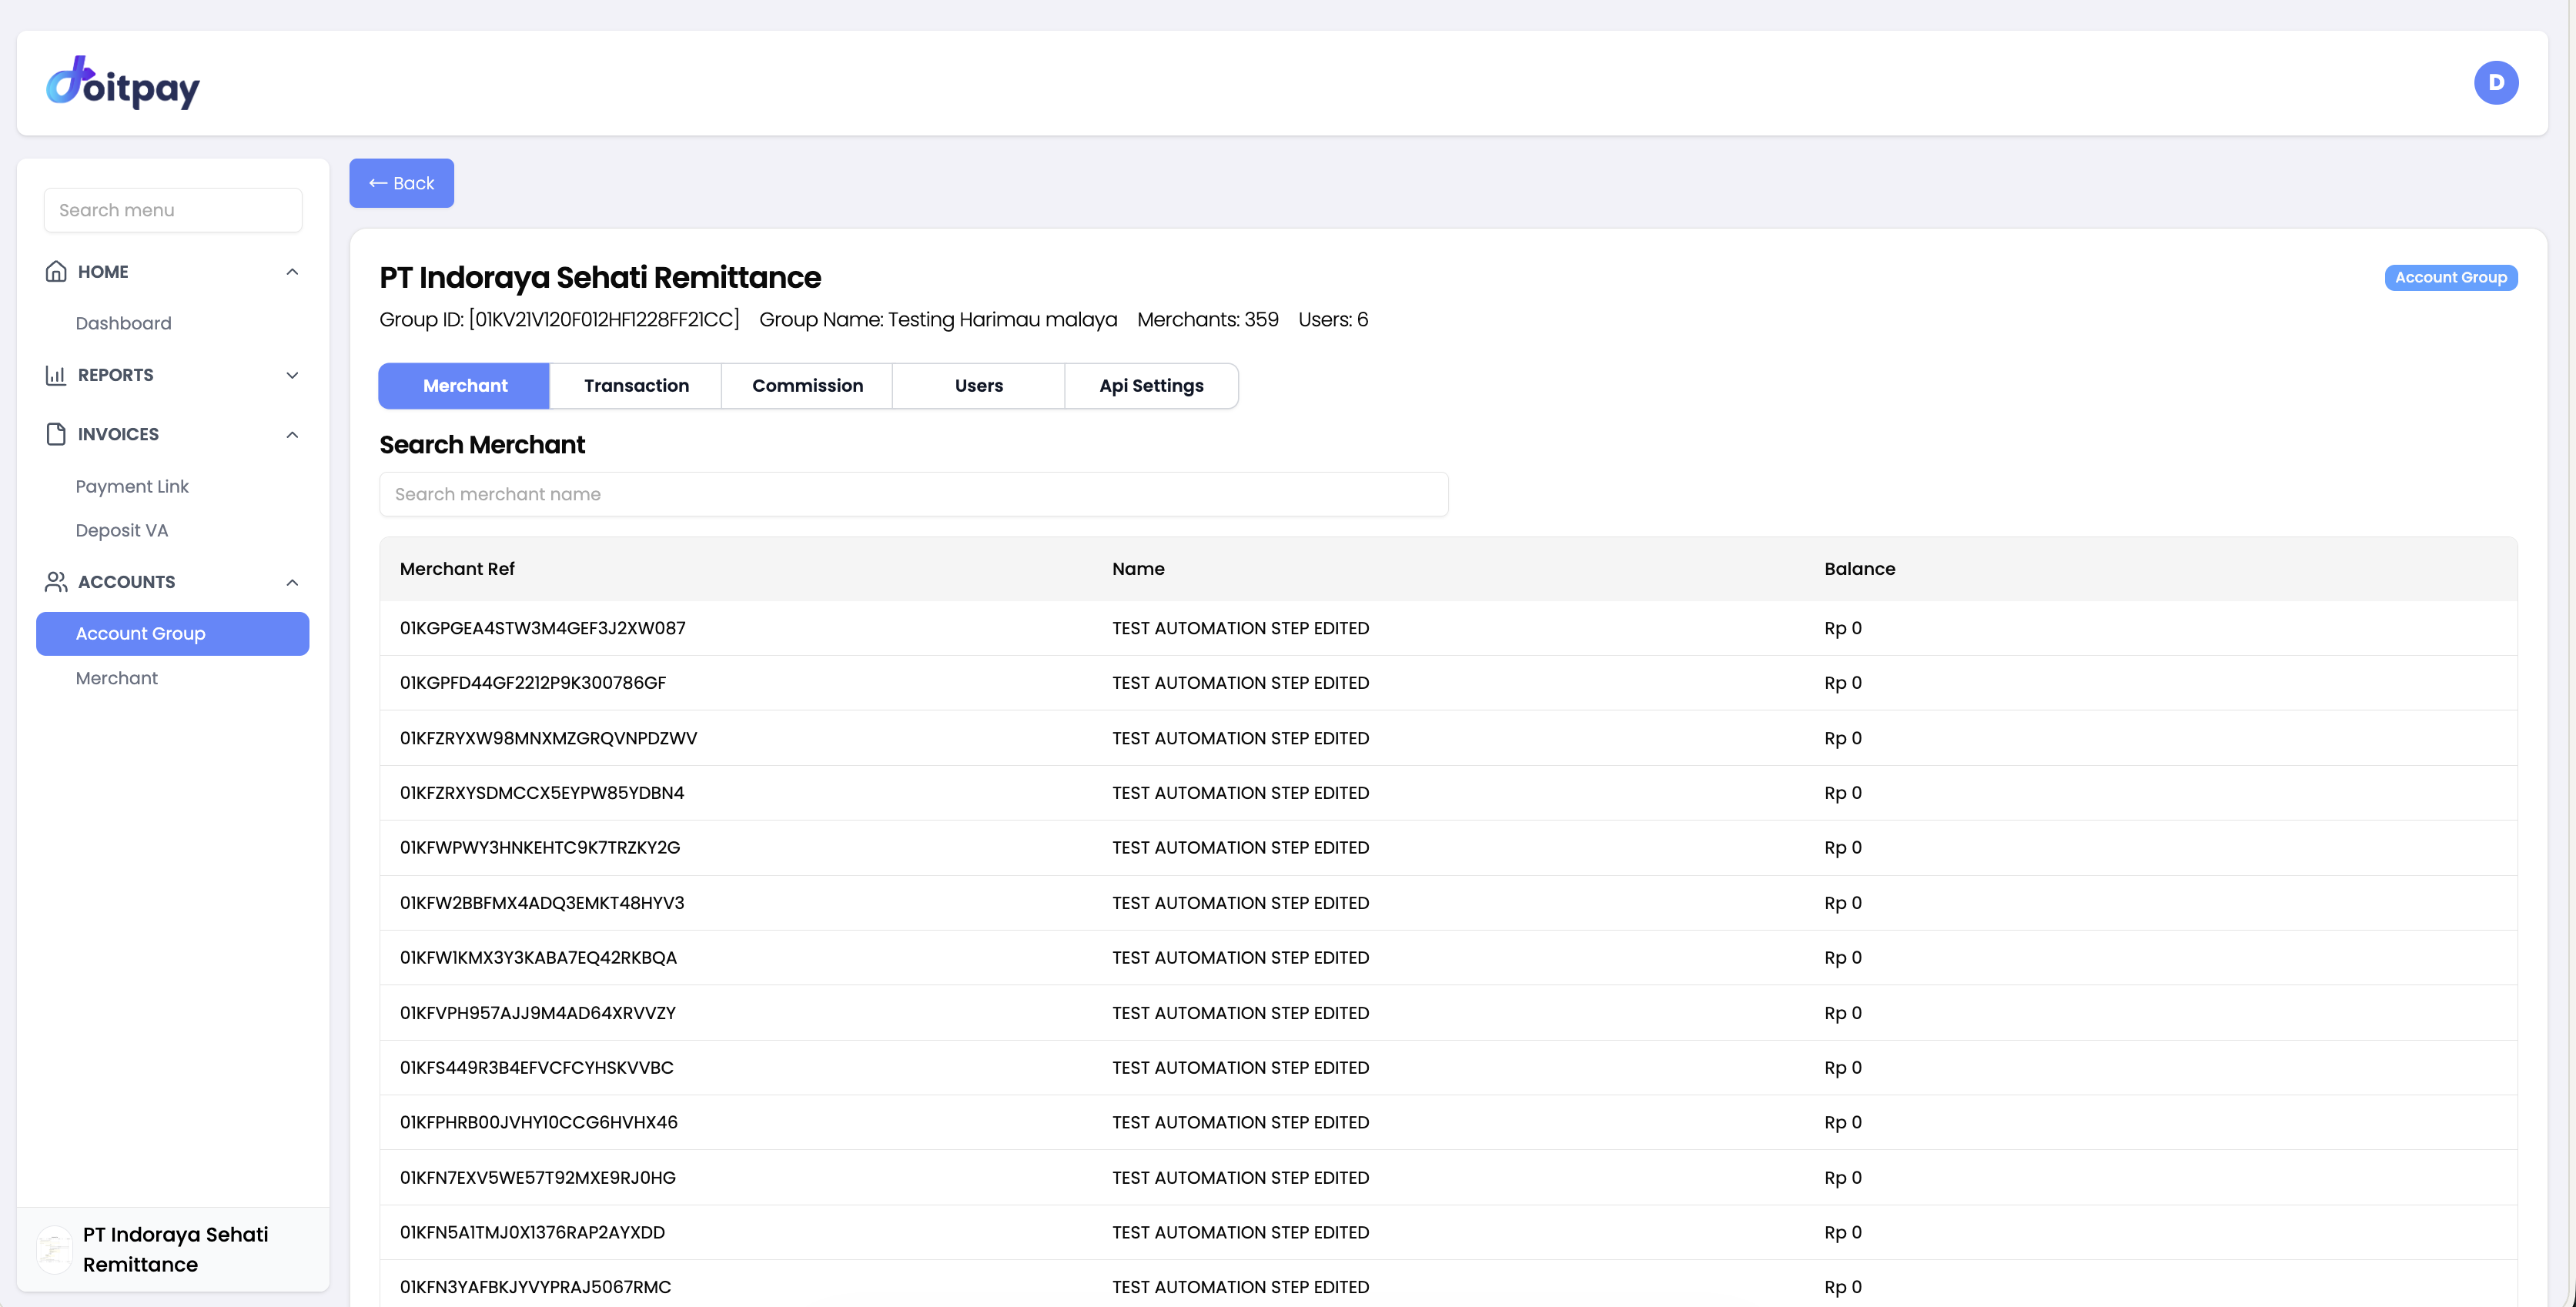
The Merchant tab lists all merchants belonging to this business.
| Column | Description |
|---|---|
| Merchant Ref | Unique reference ID for the merchant |
| Name | Merchant name |
| Balance | Current available balance for this merchant |
Use the Search Merchant field to find a specific merchant by name.
Transaction Tab
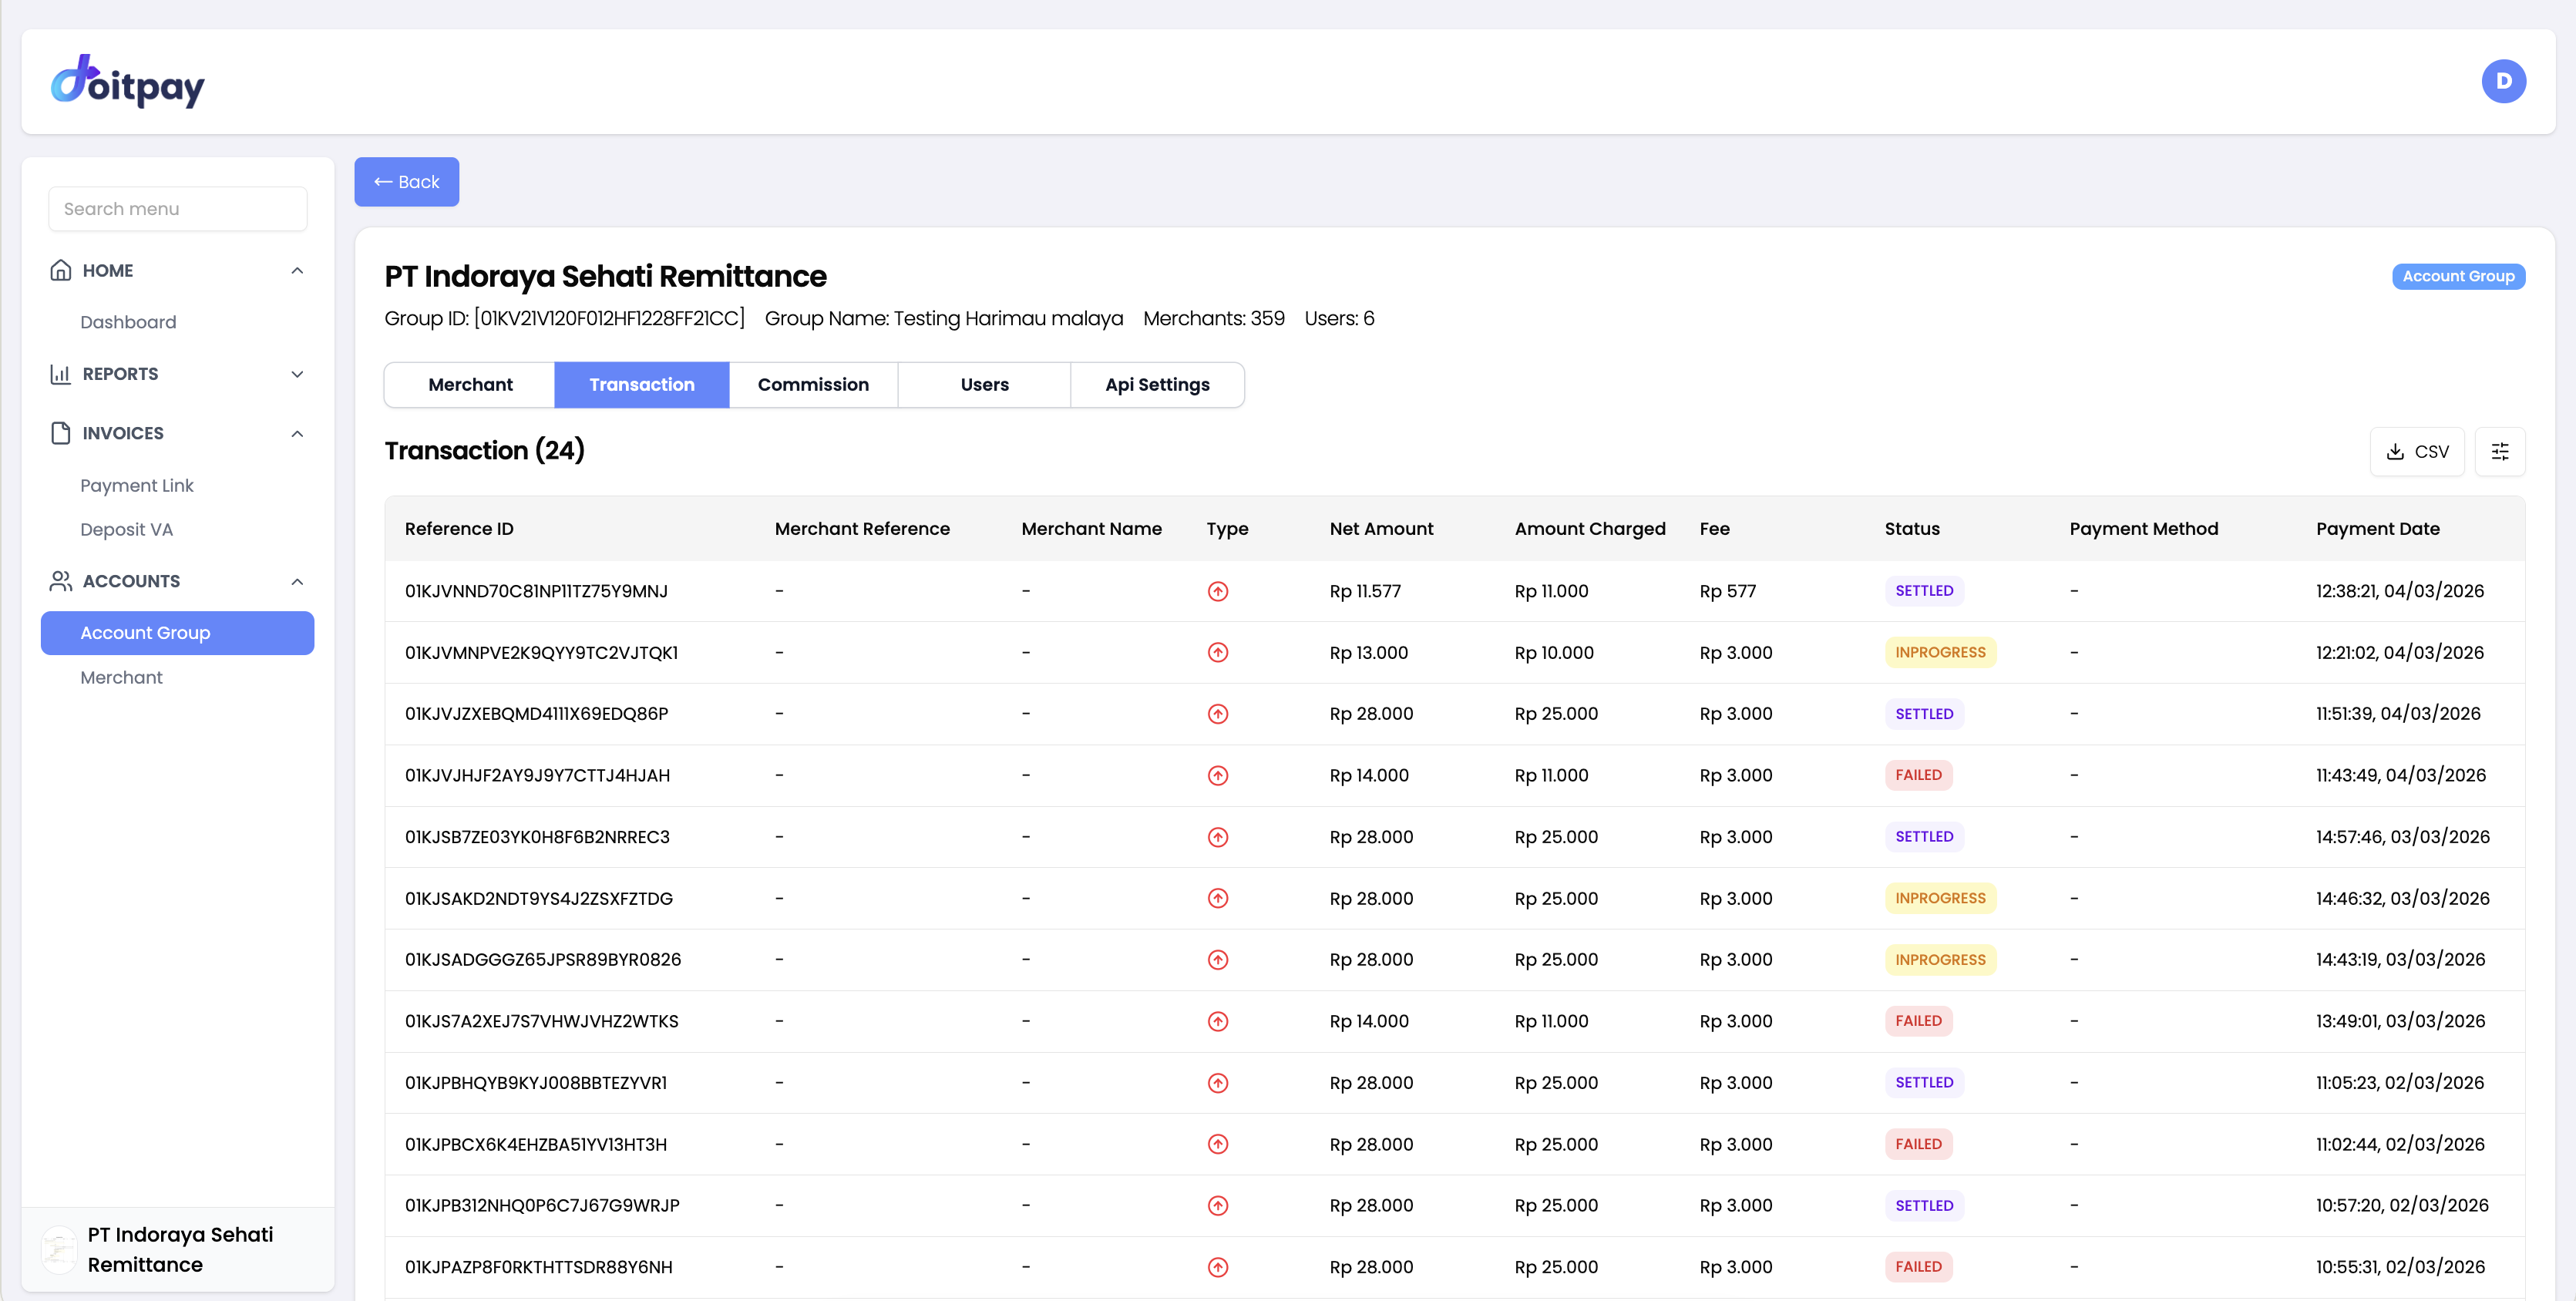
The Transaction tab shows all transactions processed across all merchants under this business.
| Column | Description |
|---|---|
| Reference ID | Unique transaction reference |
| Merchant Reference | The merchant's own reference ID |
| Merchant Name | Which merchant processed the transaction |
| Type | Credit (money in) or Debit (money out) indicated by an icon |
| Net Amount | Amount after fees |
| Amount Charged | Gross amount charged to the customer |
| Fee | Transaction fee deducted |
| Status | Current state of the transaction |
| Payment Method | Channel used (QRIS, VA, E-Wallet, etc.) |
| Payment Date | Date and time the transaction occurred |
Transaction statuses:
| Status | Meaning |
|---|---|
| SETTLED | Transaction completed and funds settled |
| INPROGRESS | Transaction is being processed |
| FAILED | Transaction did not complete |
Click CSV to export the transaction list for this business.
Users Tab
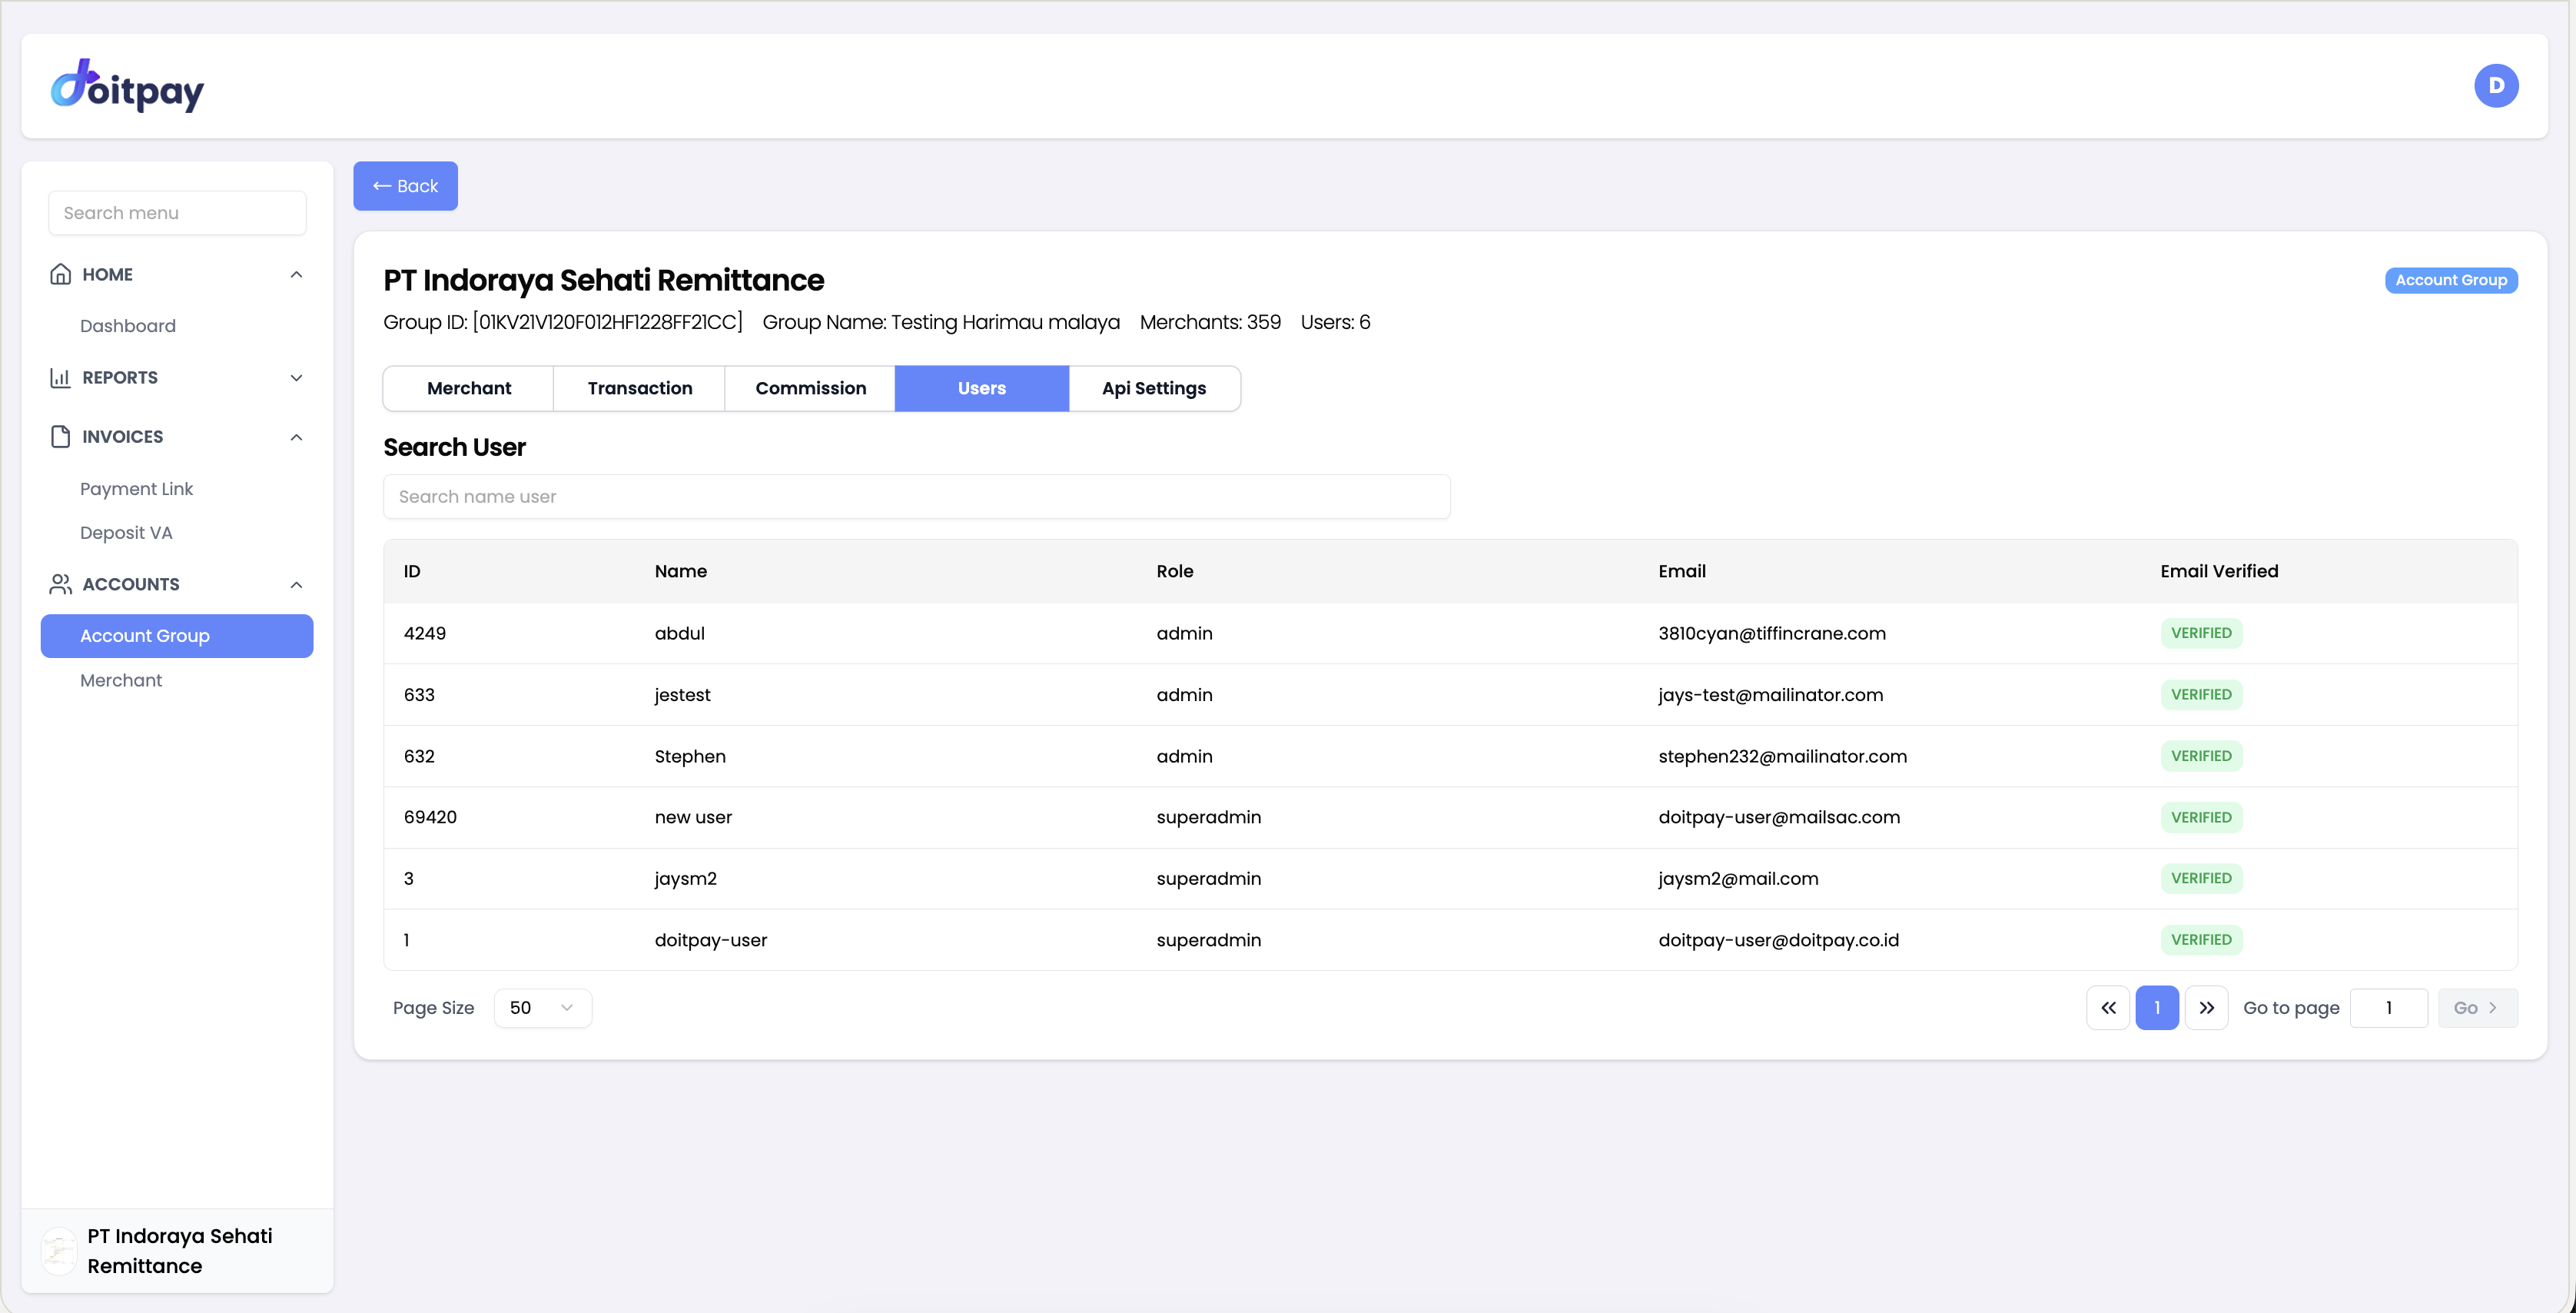
The Users tab lists all users who have access to this business.
| Column | Description |
|---|---|
| ID | Unique user ID |
| Name | User's display name |
| Role | Permission level (admin or superadmin) |
| User's registered email address | |
| Email Verified | Whether the email has been verified |
Use the Search User field to find a specific user by name. Use Page Size to control how many users are shown per page.
User roles:
| Role | Access Level |
|---|---|
| admin | Can manage merchants and view reports for this business |
| superadmin | Full access including user management and API settings |
Api Settings Tab
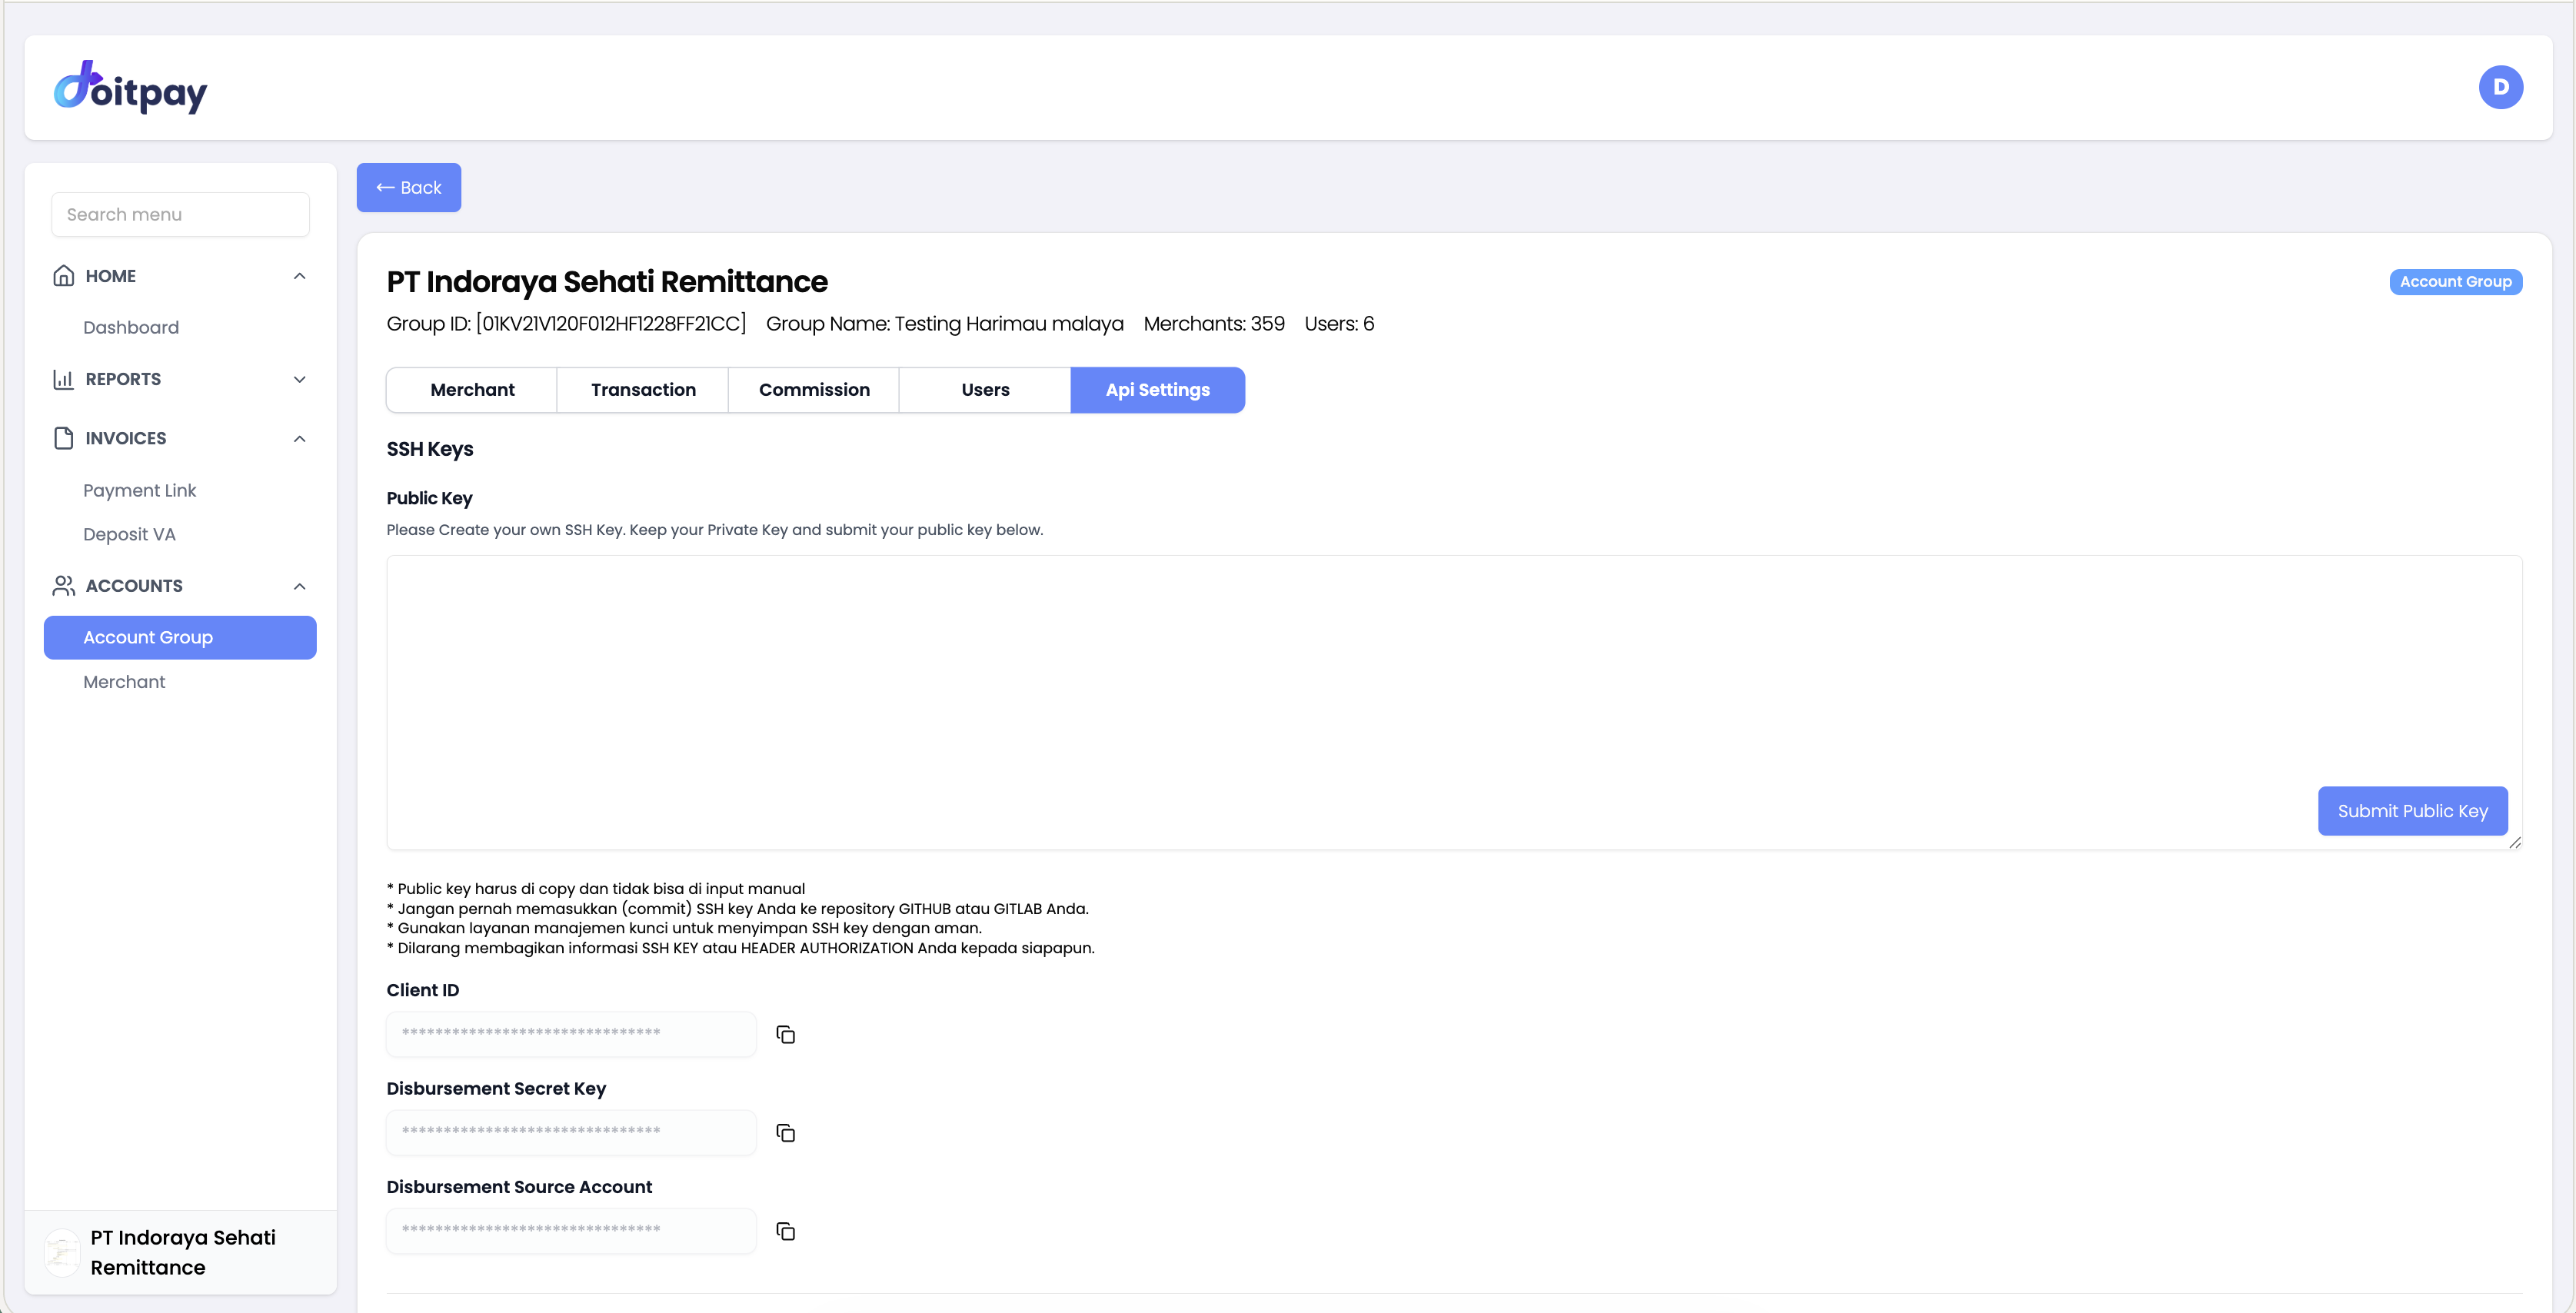
The Api Settings tab contains all technical integration credentials and webhook configurations for this business.
SSH Keys
To authenticate API requests, you need to submit your Public Key:
- Generate an SSH key pair on your system
- Paste your public key into the text area
- Click Submit Public Key
Security Notice
- The public key must be copied and pasted — it cannot be typed manually
- Never commit your SSH key to a GitHub or GitLab repository
- Use a key management service to store your SSH keys securely
- Never share your SSH KEY or HEADER AUTHORIZATION information with anyone
API Credentials
| Field | Description |
|---|---|
| Client ID | Your unique client identifier for API authentication |
| Disbursement Secret Key | Secret key used to sign disbursement API requests |
| Disbursement Source Account | The source account number used for disbursements |
Click the copy icon next to each field to copy the value to your clipboard. All values are masked for security.
Webhook Configuration
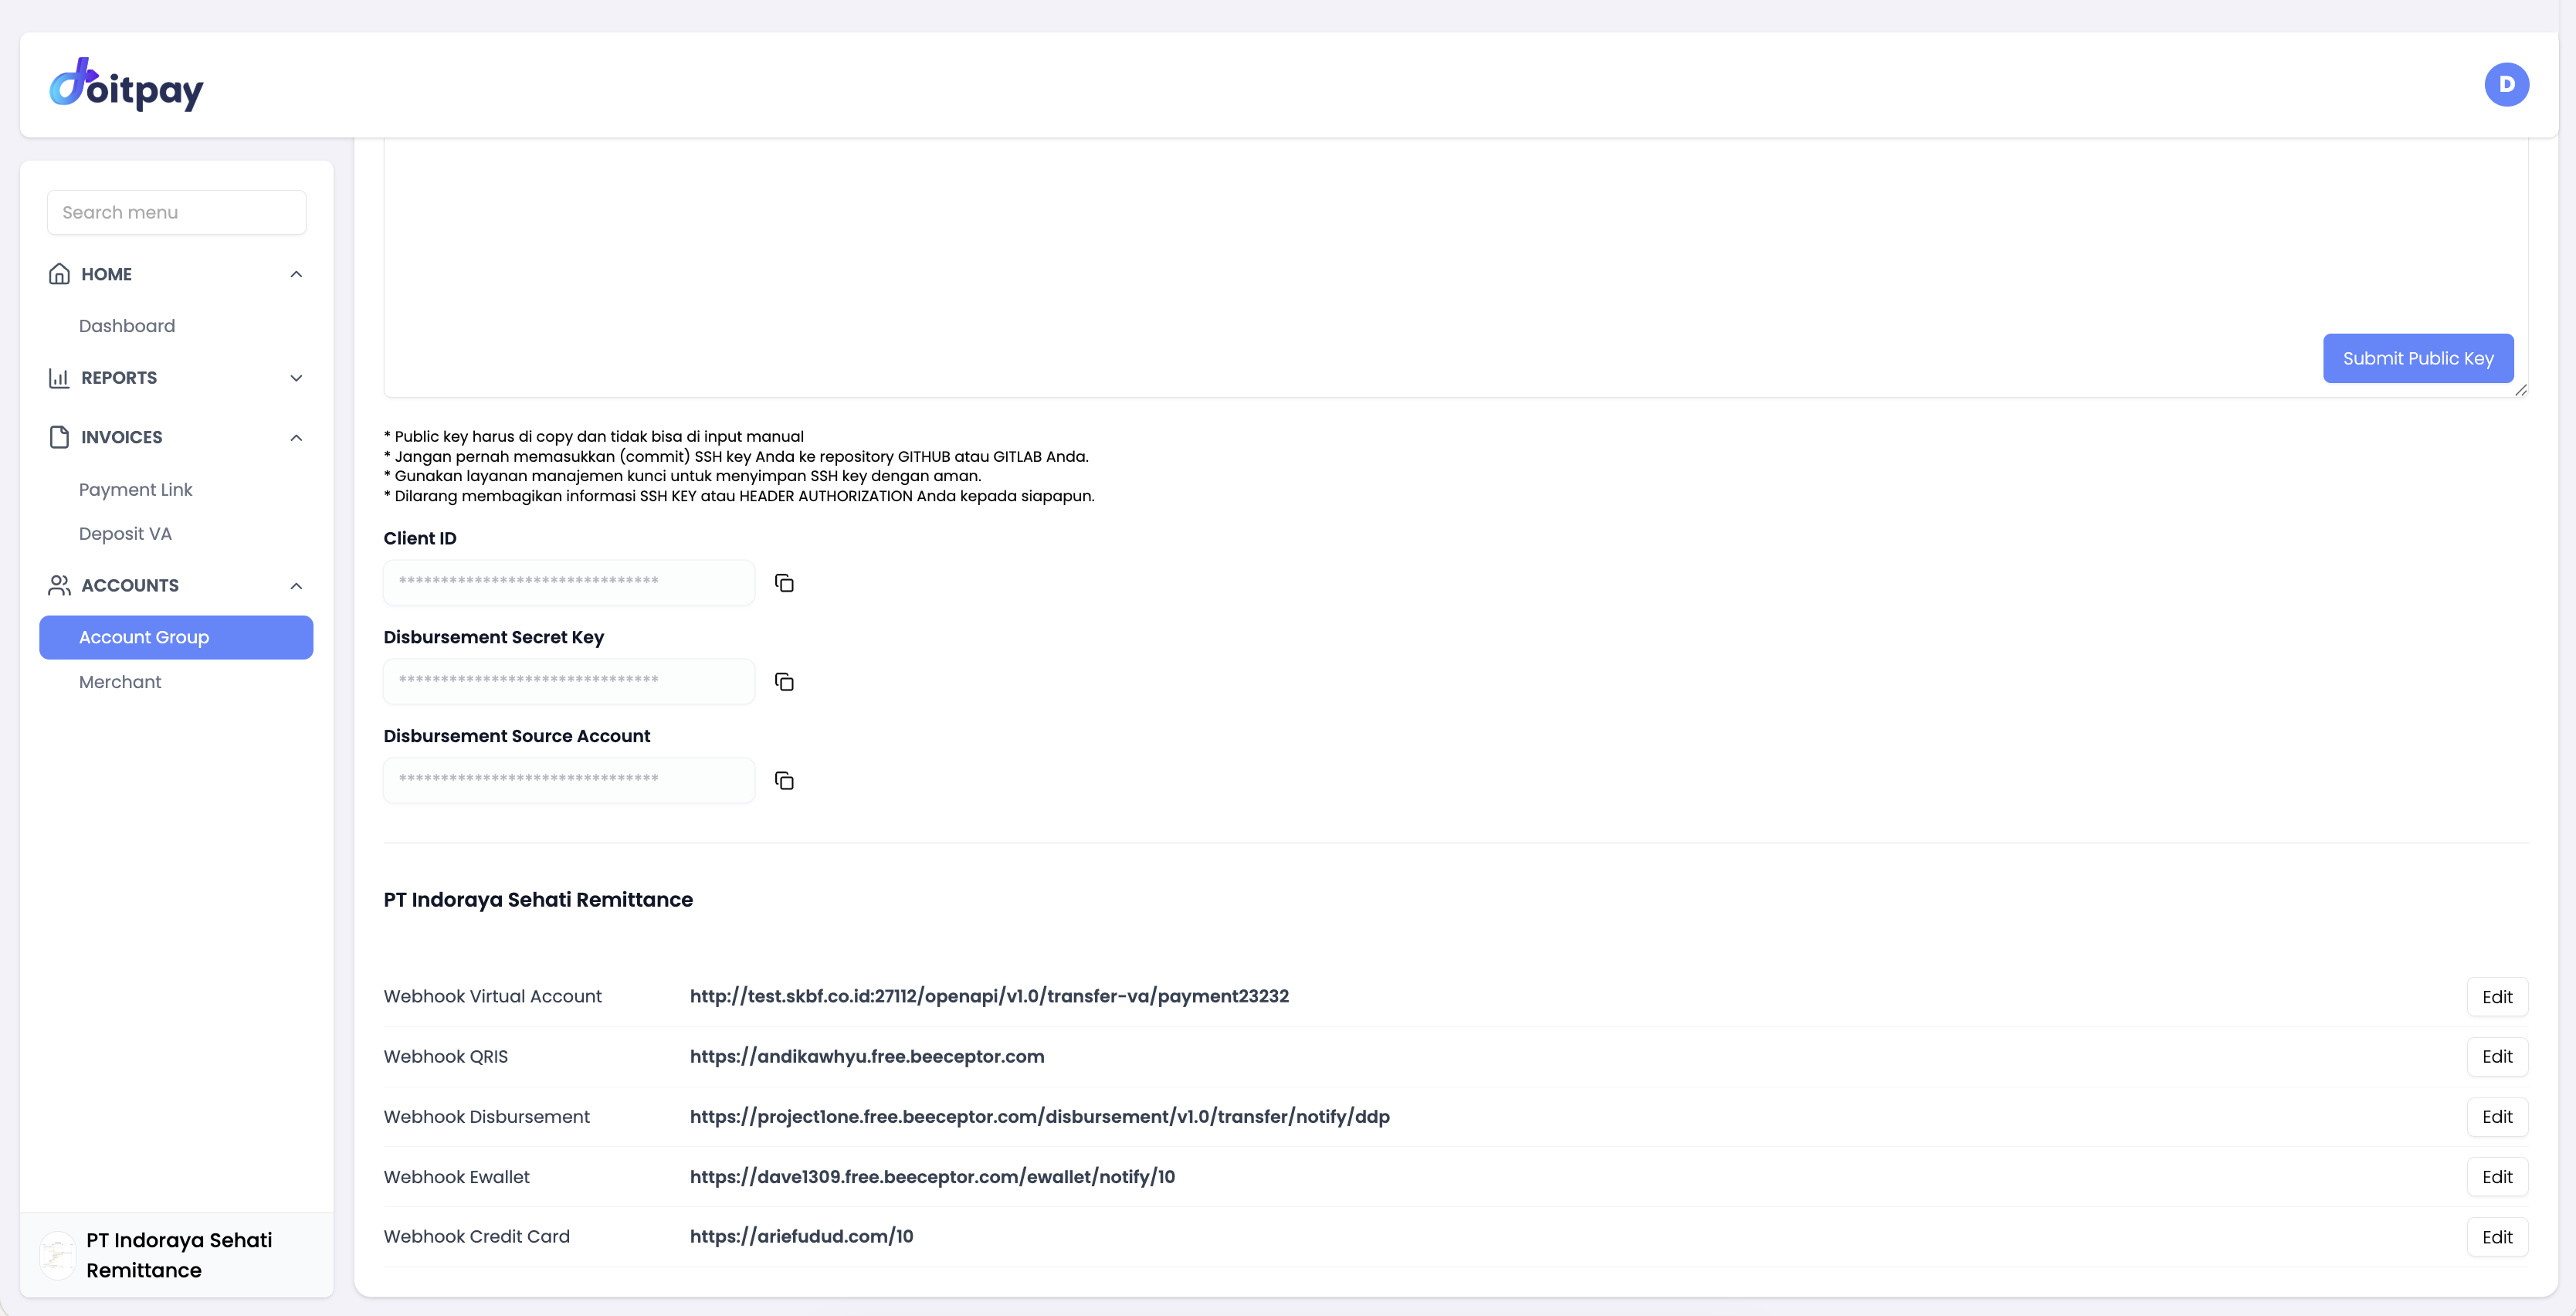
Webhooks allow Doitpay to send real-time notifications to your server when events occur. Configure a URL for each payment channel:
| Webhook | Triggered when |
|---|---|
| Webhook Virtual Account | A VA payment is received |
| Webhook QRIS | A QRIS payment is completed |
| Webhook Disbursement | A disbursement transfer is processed |
| Webhook Ewallet | An e-wallet payment is completed |
| Webhook Credit Card | A credit card payment is completed |
Click Edit next to any webhook to update the URL.
Common Questions
Q: How do I add a new business?
Contact your account manager to add new businesses to your account group.
Q: Can I have multiple businesses under one account?
Yes, you can have multiple businesses, each with their own merchants and users.
Q: What is the difference between Business and Merchant?
A Business is a legal entity or division that has full dashboard access, manages its own settlement, disbursement balance, API credentials, and users. A Merchant is an individual store or outlet under a business — it only accepts payments and does not have dashboard or reporting access. For example, a retail company (Business) might have multiple store locations (Merchants) that each accept payments, while settlement and reporting are handled at the business level.
Q: How do I deactivate a business?
Contact your account manager to change business status.
Q: Where do I find my API credentials?
It depends on your account type:
- Account within a group: Go to ACCOUNTS > Account Group, click on your business, then open the Api Settings tab.
- Independent business: Click your profile icon in the top-right corner, then select API Settings. See Profile & Settings - API Settings for details.